How To Start Your Own Blog in 2020? – Step-by-Step Guide

How To Start Your Own Blog in 2020? – Step-by-Step Guide
If you are looking for easy step-by-step guide on how to start to your own blog in 2020, then you are in the right place.
I have been working on blogs since 2005. I have launched several of my own blogs, and helped other webmasters do the same.
I know that some of them feel starting a blog is overwhelming and difficult. This guide is all about blogging for beginners, and will help you learn how to be a blogger with just basic computer knowledge. By following these step-by-step guide you can start your own blog in 2020 easily in a short time.
I have to admit that when I was first learning how to build a blog I made a ton of mistakes. You can benefit with my experience so that you don’t repeat these same mistakes when you start your own blog. I created this free guide so that you can learn how to blog quickly and easily.
Also Read – 7 Organic Ways To Increase Your Website Traffic in 2020
What is a Blog?
A blog is a type of website that focuses mainly on written content, which consists of blog posts. Now a days, we most often hear about news blogs or celebrity blogs, but, you can start a blog by just selecting any topic of your choice.
In general, most of the bloggers write content from their personal perspective that gives them a chance to connect directly with their audience. Also, these days blogs have a comments section where audience can interact with the blog owners.
In this way interaction between the blog owner and audience helps improve the content standards which is more helpful for the audience who are happy to come to blog and read the content and thereby improve knowledge.
This is the most beneficial part as the direct connection of blogger to the audience is one of the main benefits of starting a blog. This connection allows blogger to interact more and share ideas with other like-minded audience. It allows you to build trust with your readers. Having the trust and loyalty of your readers also opens up the door to making money from your blog.
If you are a beginner, and if you haven’t started your own blog then this post might help you to start your own blog. Web Hosting is an important step towards building a successful blog. You need to select the best and reliable web hosting provider that will offer you best web hosting space with excellent network up time for your blog with good customer support 24*7 as well.

Now we are speaking about the best web hosting provider these days, first name that comes in our mind is HOSTGATOR – Best Domain and Hosting Service Provider. HostGator is a global provider of web hosting and related services. Founded in a dorm room at Florida Atlantic University by Brent Oxley, HostGator has grown into a leading provider of Shared, Reseller, VPS, and Dedicated web hosting. HostGator is headquartered in Houston and Austin, Texas, with several international offices throughout the globe.
In order to start your own blog, you need to follow below steps:
- Buy a Domain.
- Choose Hosting Plan for your blog.
- Purchase SSL Certificate.
- Install WordPress.
1. Buy a Domain –
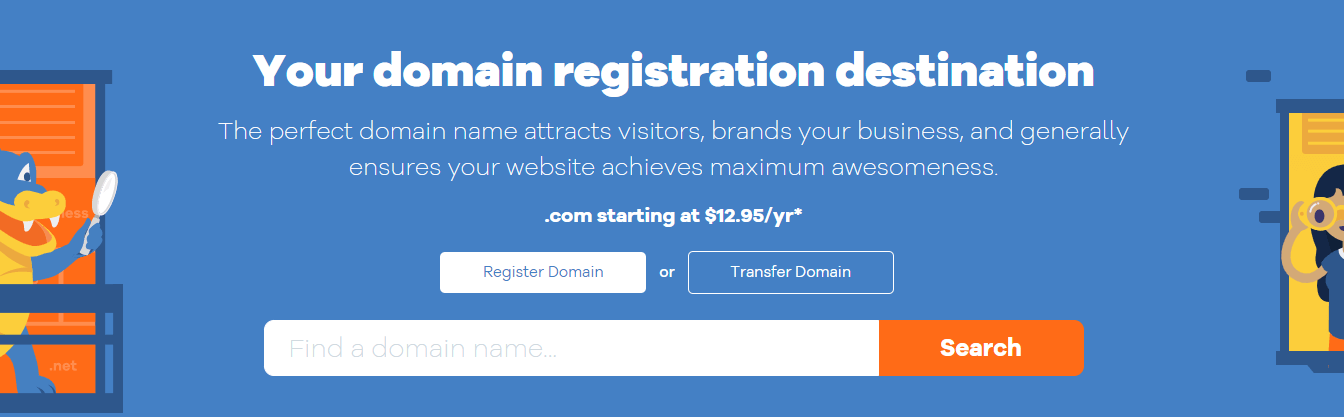
In Hostgator platform while buying a domain you have option to choose from a wide range of domain extensions like – ( .com, .in, .net, .co, etc) which match your business name, goal or idea.
With every domain you purchase at hostgator, you will get all the below features:
- Email Accounts –
You will get two 100 MB personalized email accounts with anti-spam and virus protection.
- Easy-to-use Control Panel –
You can manage your domain name, renew your order and make the most of your purchase with our intuitive control panel.
- Domain Theft Protection –
You can enable theft protection for your domain name that will protect your domain from being transferred out accidentally or without your permission.
- Domain Forwarding –
Domain forwarding feature lets you automatically direct your website visitors to a different place on the web.
- DNS Management –
You can manage your DNS records, email accounts, sub domains, aliases, FTP and more.
- Email Forwarding –
You can use the Email Forwarding feature that enables you to automatically forward/route all the incoming emails from an account to another chosen destination account.
2. Choose Hosting Plan for your blog –
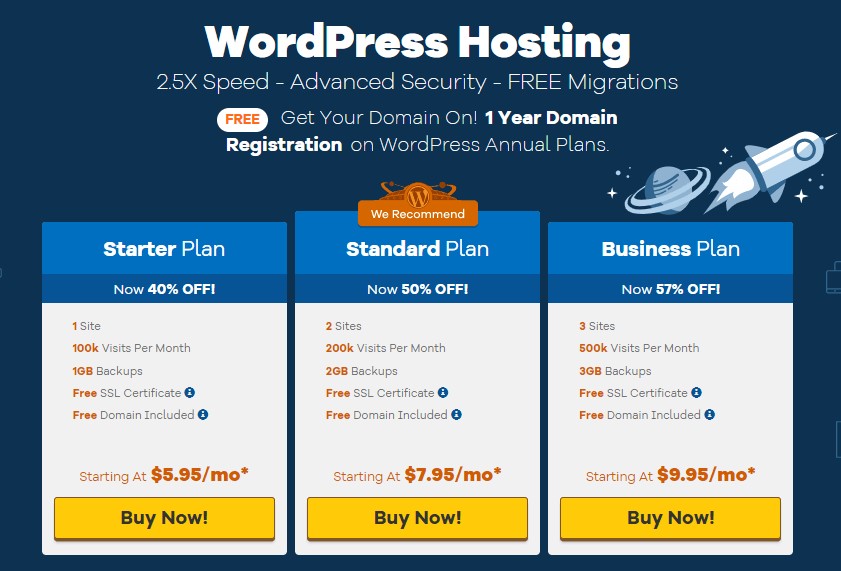
While choosing a best hosting plan for your blog, with my experience all i can say is that, the WordPress Hosting plan provided by Hostgator is the best one to buy for your blog. Buy WordPress Hosting from Hostgator.
You can use the Promo Code – ( TECHSMB2020 ) and avail discount of 55% off on purchasing a WordPress Hosting Plan from Hostgator.
What is WordPress Hosting?
WordPress is a popular open source content management system (CMS), written in PHP. WordPress Hosting is specifically designed to boost websites performance with enhanced security, scalable technology, and automated updates.
Why Choose WordPress Hosting Plan from Hostgator?
After you choose wordpress hosting plan from Hostgator you will get below features for your blog –
- Pre-installed Jetpack –
You can choose from over hundreds of readily available themes, plugins and services to build your website with minimal coding.
- Superior Server Performance –
Hosting specially optimized for WordPress powered websites. The server architecture, databases have been developed to enhance the performance of your website.
- Automatic Updates –
Any patches or version upgrades released by WordPress are automatically installed for your WordPress hosting plan, which makes your website future-proof and secure.
3. Purchase SSL Certificate –
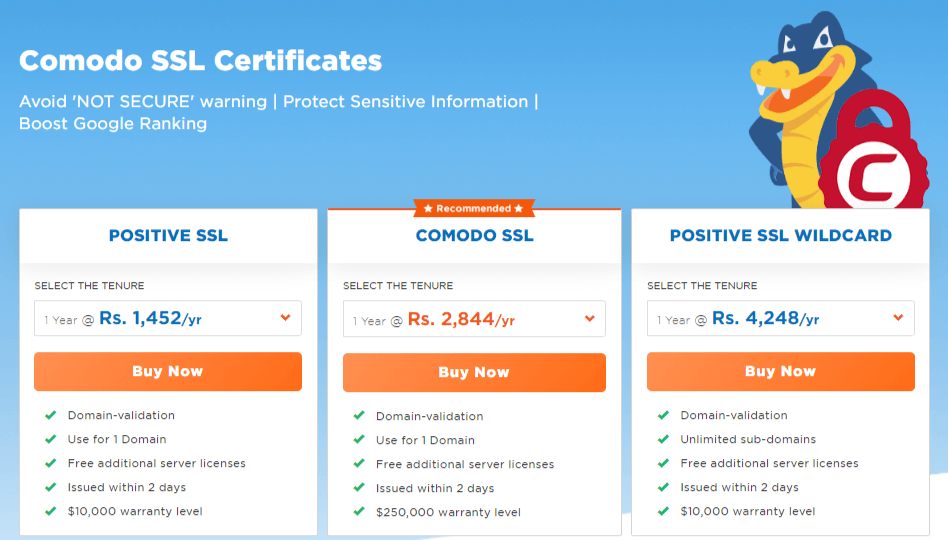
Always remember that whenever you buy a new domain along with that you also have to purchase an SSL Certificate, which has become compulsory these days, as it helps domains remain secure and any information entered by users in the websites stays safe in the web browser cookies, and is also one of the ranking factors for google search engine.
What is SSL Certificate?
SSL Certificate refers to Secure Sockets Layer Certificate which is a digital certificate that verifies the identity of any website and encrypts information sent to and from website to server.
Why Purchase SSL Certificate from Hostgator?
After you purchase SSL Certificate from Hostgator you will get below features for your blog –
- Protect Sensitive Information –
If you have an SSL Certificate or HTTPS Certificate installed for your website it creates a secure environment for users to accept debit/credit payments and helps boost customer trust.
- Boost Google Ranking –
An SSL Certificate website always offers a safer browsing experience and it also helps website for better search engine rankings.
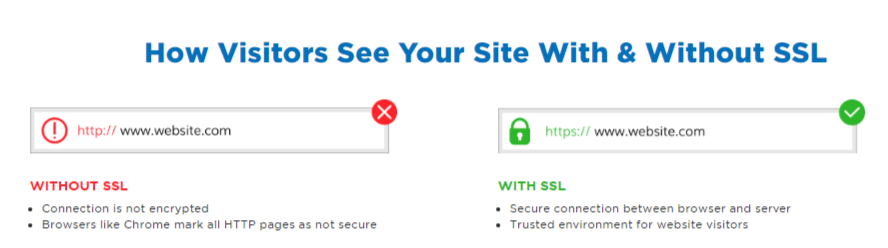
- Avoid ‘NOT SECURE’ Warning –
With SSL Certificate you can protect your website with the green padlock by a trusted SSL service provider like Hostgator and your website can avoid the not secure warning in the browser and in search engines.
How SSL Certificate works for your blog/website?
When your customer visits your SSL protected site, the SSL Certificate creates an encrypted connection with their browser.
On secure encryption, a padlock icon will appear in your customers web browser to notify them their connection is secure.
With Comodo certificates the information passed to and from your website are provided upto 128/256-bit encryption.
4. How to Install WordPress?
HostGator is popular WordPress hosting provider worldwide. They also make it super easy to install WordPress with just a few clicks.
Follow below steps to install wordpress from Hostgator for your blog –
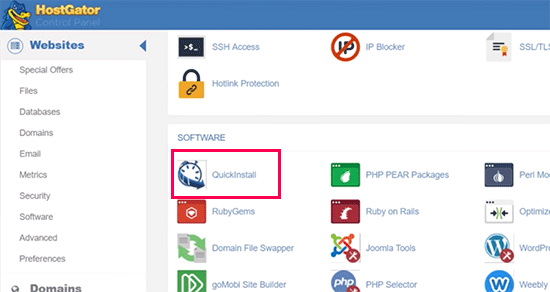
Firstly, you need to login to your HostGator hosting account’s dashboard. From here, you need to click on the ‘QuickInstall’ icon under the ‘Software’ section.
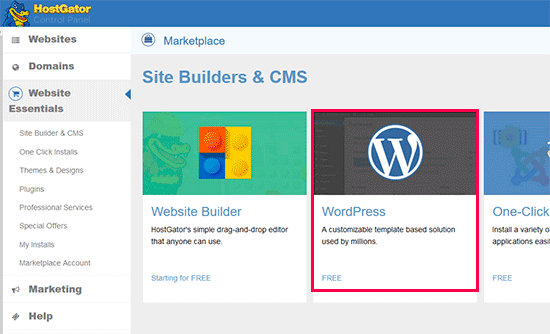
On the next screen, you need to click on ‘WordPress’ to launch the installer wizard.
Now, you will be asked to select the domain name where you want to install WordPress and enter a directory path.
Most beginners want to install WordPress in the root of their domain name (for example, techsmashable.com). In that case, you need to leave the directory field blank.

Click on the next button to continue.
The installer will now ask you to enter WordPress site details. You will need to provide a site title, admin username, first and last name, and an admin email address. Make sure that you have access to that email address because this is where you will get your WordPress password reset email.
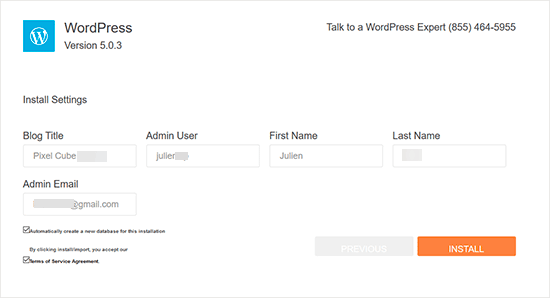
After entering all the information, click on the ‘Install’ button to continue.
The installer will now run in the background to install WordPress for you. Once finished, you will see a success message with your admin user name and password.
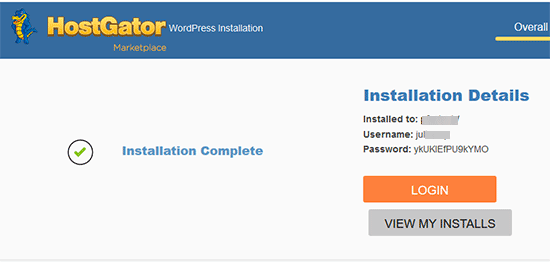
You can now click on the ‘Login’ button to access the WordPress admin area.
Congratulations, you have successfully installed WordPress on your HostGator account.
Conclusion –
I Hope this article about, “How To Start Your Own Blog in 2020?” will help you launch your blog in easy steps and i wish you all success, and yes finally welcome to blogging community and Happy Blogging!!
If you have any queries you can ask in the comments section, i will be happy to interact with you.
Also Read – Differences between WordPress.org and WordPress.com Websites